justarandomguy
Magistrate
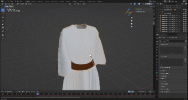
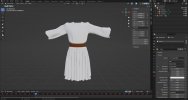
After my break and some research, I can bring you the making of my "The last days of a roman woman story".
I wanted others to be able to take stills from Ramon's passion of the christa (or any other production with dark lightning) and be able to use them for manips.
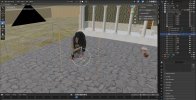
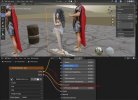
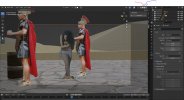
I could also bring advice for blender if people ask for it.
While for the image editing I used photoshop, I tried to research how to do the same on free software, in order to not lock this behind adobe's subscription paywall. In this case, I will be using the GIMP 2.10.36 software.
The first deal is how to make a png out of a dark photoshoot/video.
The following method will be a simplified version, you can optimize things if you know more advanced image editing methods.
Making a png out of a dark image.
Step 1
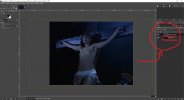
First off, open your still and duplicate it. You have two layers of the same picture.
Hide one of the two layers and save it for later.
Step 2
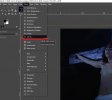
While you have the visible layer selected, go to the colors tab on the top left, then select curves.
Step 3
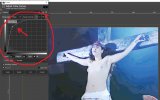
Move the curve to the top left, burn that image boy, BURN IT.
Jokes aside, the point of this is making the image brighter in order to make the task of removing the background easier.
Adjust the curve until you can easily tell the subject from the background apart.
Step 4
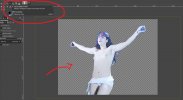
After you remove the background with your favorite method, pick a magic wand or equivalent tool. In GIMP's case, it's called "fuzzy select tool". Select the or all the areas where there is no subject (AKA, the background we just removed).
Step 5
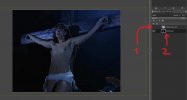
While keeping this selection, hide the over-exposed layer and make visible the original one and delete the selection.
Step 6
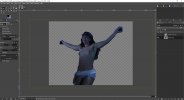
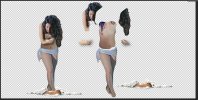
Ta-da, the image is now cropped. This extra step with the original layer is meant to solve the problem that once you overexpose an image, it's hard to change it without the overexposure making the image lose some information, thus making the picture quality look bad.
Step 7
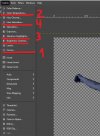
It's time to tweak the proprieties to change the lightning. I recommend you to change them in the following order.
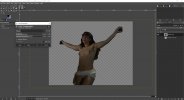
Color temperature is where the magic lies at. Move the two sliders to tweak your picture, which makes it look "colder" or "warmer". While I used this mainly to make it look like a daytime setting by making the image warmer, you can do the exact opposite. It also works great to change the mood of a scene or make the subject match with different weather settings.
Step 9
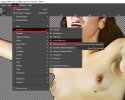
If the image looks "noisy" (ugly pixels here and there), you could go to the "Filter" tab, then go down to "Enhance", and then select "Noise reduction". Don't abuse too much of this or the picture will look too clean.
Step 10
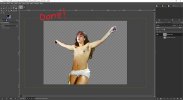
Do whatever final tweaks you need depending on the image, and you are done!
Hopefully this helps you, and I will be gladly waiting to see what you come up with.
Have fun!
PS: Forgive me if I can't post 10 pictures for this kind of thread by the way
I wanted others to be able to take stills from Ramon's passion of the christa (or any other production with dark lightning) and be able to use them for manips.
I could also bring advice for blender if people ask for it.
While for the image editing I used photoshop, I tried to research how to do the same on free software, in order to not lock this behind adobe's subscription paywall. In this case, I will be using the GIMP 2.10.36 software.
The first deal is how to make a png out of a dark photoshoot/video.
The following method will be a simplified version, you can optimize things if you know more advanced image editing methods.
Making a png out of a dark image.
Step 1

First off, open your still and duplicate it. You have two layers of the same picture.
Hide one of the two layers and save it for later.
Step 2

While you have the visible layer selected, go to the colors tab on the top left, then select curves.
Step 3

Move the curve to the top left, burn that image boy, BURN IT.
Jokes aside, the point of this is making the image brighter in order to make the task of removing the background easier.
Adjust the curve until you can easily tell the subject from the background apart.
Step 4

After you remove the background with your favorite method, pick a magic wand or equivalent tool. In GIMP's case, it's called "fuzzy select tool". Select the or all the areas where there is no subject (AKA, the background we just removed).
Step 5

While keeping this selection, hide the over-exposed layer and make visible the original one and delete the selection.
Step 6

Ta-da, the image is now cropped. This extra step with the original layer is meant to solve the problem that once you overexpose an image, it's hard to change it without the overexposure making the image lose some information, thus making the picture quality look bad.
Step 7

It's time to tweak the proprieties to change the lightning. I recommend you to change them in the following order.
- Curves
- Color temperature (will elaborate on this one for the next step)
- Shadows-Highlights
- Hue-Saturation (in case the image looks too pale, increase the saturation)
- Brightness-Contrast (Optional for the contrast)

Color temperature is where the magic lies at. Move the two sliders to tweak your picture, which makes it look "colder" or "warmer". While I used this mainly to make it look like a daytime setting by making the image warmer, you can do the exact opposite. It also works great to change the mood of a scene or make the subject match with different weather settings.
Step 9

If the image looks "noisy" (ugly pixels here and there), you could go to the "Filter" tab, then go down to "Enhance", and then select "Noise reduction". Don't abuse too much of this or the picture will look too clean.
Step 10

Do whatever final tweaks you need depending on the image, and you are done!
Hopefully this helps you, and I will be gladly waiting to see what you come up with.
Have fun!
PS: Forgive me if I can't post 10 pictures for this kind of thread by the way


