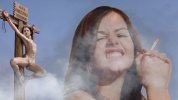
Kindly sent to me by Bobinder..
How to make smoke like Arcimboldo
Using Photoshop
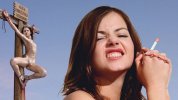
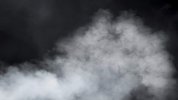
A demonstration using just these two jpg images -


If your smoke layer is a black and white image to start with, you can use it as a ready-made 'silhouette' for a layer mask. I.e. you don't need to create the layer mask by dodging and burning etc because it is already black and white with the shades of grey which will work as semi-transparent areas. So, here is how to make a simple layer mask for smoke.
1. Place original subject picture (e.g. 'Alice snarling') as Layer 1 - rename layer as 'Alice'.
2. Paste smoke jpg as Layer 2 - rename layer as 'Smoke'.
3. With only the 'Smoke' layer visible, and as the active layer, in the layer order panel, switch from 'Layers' to 'Channels'.
4. In 'Channels', all channels will appear active. Click on 'Red, 'Green' and 'Blue', highlighting them individually, to see which channel has the highest contrast. In this particular case, the smoke image is already monochrome, so there is almost no difference in contrast between the channels.
5. I chose 'Red'. Click on 'Red', right click and select 'Duplicate Channel'. The box confirms, 'Red copy' - so click, 'OK'.
6. 'Red copy' appears at the bottom of the channels list. With this as the only visible layer, and as the active layer, click on 'Select' on the top row.
7. From the 'Select' drop-down menu, click on 'Load Selection'. The box confirms, 'Untitled/Red copy' - click 'OK'.
8. You will now see part of the image selected. It is a complex shape, but everything necessary has been selected.
9. With the selection loaded, switch back to 'Layers'.
10. If you have the row of seven small icons in the lower right corner, the third one should reveal, 'Add Layer Mask'.
If not, click on 'Layer' on the top row. From the drop-down menu, select 'Layer Mask' which now provides further options - click on 'Reveal Selection'.
11. Either way, the layer mask is created, and it shows in the 'Layers' order panel with a double thumbnail image.
The left image is the visible image - click on that one to make image adjustments (e.g. brightness, contrast etc just like a normal colour image layer). You can enlarge and rotate it - basically treat it exactly the same as if it was a cut-out layer!
The right image is the mask - click on that to make adjustments to the mask. With the 'Smoke' layer active, you can also make adjustments to reduce the opacity of the layer (i.e. make the smoke fainter).
12. Some faint horizontal lines are still visible in the smoke image, so we are going to reduce those by adjusting the mask.
13. Click on the 'Smoke' right thumbnail to activate the mask, and then select the 'Burn' tool from halfway down the left hand toolbar. This has three options which are, 'Dodge Tool', 'Burn Tool' and 'Sponge Tool'. Any one of them might be showing. My 'Burn Tool' has an icon which looks like a closed fist (I don't know why...)
14. The burn tool shows a circle on the screen. Right click to adjust the size of the circle, which provides the area of the 'burn' or darkening effect. I made mine fairly large.
15. With the 'Smoke' mask active, run the 'Burn Tool' over the faint horizontal lines starting in the upper left corner. It will not darken the image (which is the normal effect) because the image is not active. In fact it will lighten the worked area because it is actually increasing the density of part of the mask, and beginning to conceal those faint lines.
16. The 'Burn' stage can be reversed by using the 'Dodge Tool' or a white brush on the same area, to apply the opposite effect to the mask. A black brush will do the same as 'burning'. N.B. for dodging and burning a mask effectively, the 'Dodge Tool' should be set to 'Highlights' and the 'Burn Tool' should be set to 'Shadows'. We can take a closer look at this later. Don't worry too much about it at this stage.
Result -

Smoking damages your health. Please do not try this at home.


